
Interior Staining
Enhancing the Beauty of Wood in Your Home
Interior staining is a great way to enhance the natural beauty of wood surfaces in your home. From handrails and ceilings to wood mantles and beams, staining can transform the mundane into the magnificent. Interior staining is more than just a step in finishing wood; it’s an art form that brings out the soul of the wood, allowing its natural beauty and character to shine through. This technique involves the careful application of translucent tints that seep into the wood fibers, accentuating the grain and enhancing the color. Unlike paint, which masks the wood’s true identity, stain works with the wood’s unique features to create a finish that’s both protective and aesthetically pleasing.
The Science of Stain
At its core, the staining process is a fascinating interplay between the stain’s chemistry and the wood’s porosity. Different woods absorb stain differently, with factors such as grain density, age, and moisture content affecting the final outcome. This variability means that staining is as much about understanding the material as it is about the technique.
Stains come in a variety of types, each with its own properties and purposes:
- Oil-Based Stains: Renowned for their deep penetration and durability, oil-based stains are a popular choice for interior projects. They provide long-lasting color richness and are ideal for woods with dense grains.
- Water-Based Stains: These stains dry quickly and emit less odor, making them a great option for quick projects or environments where ventilation is a concern. Water-based stains are also less likely to yellow over time, preserving the wood’s natural hue.
- Gel Stains: With a thicker consistency, gel stains offer more control during application, reducing drips and sags. They’re particularly effective for vertical surfaces or for woods with uneven grain patterns, ensuring a more uniform appearance.
- Lacquer Stains: Quick-drying and durable, lacquer stains are often used in professional settings. They require special application techniques but offer a sleek, hard finish that’s resistant to scratches and wear.
The Art of Application
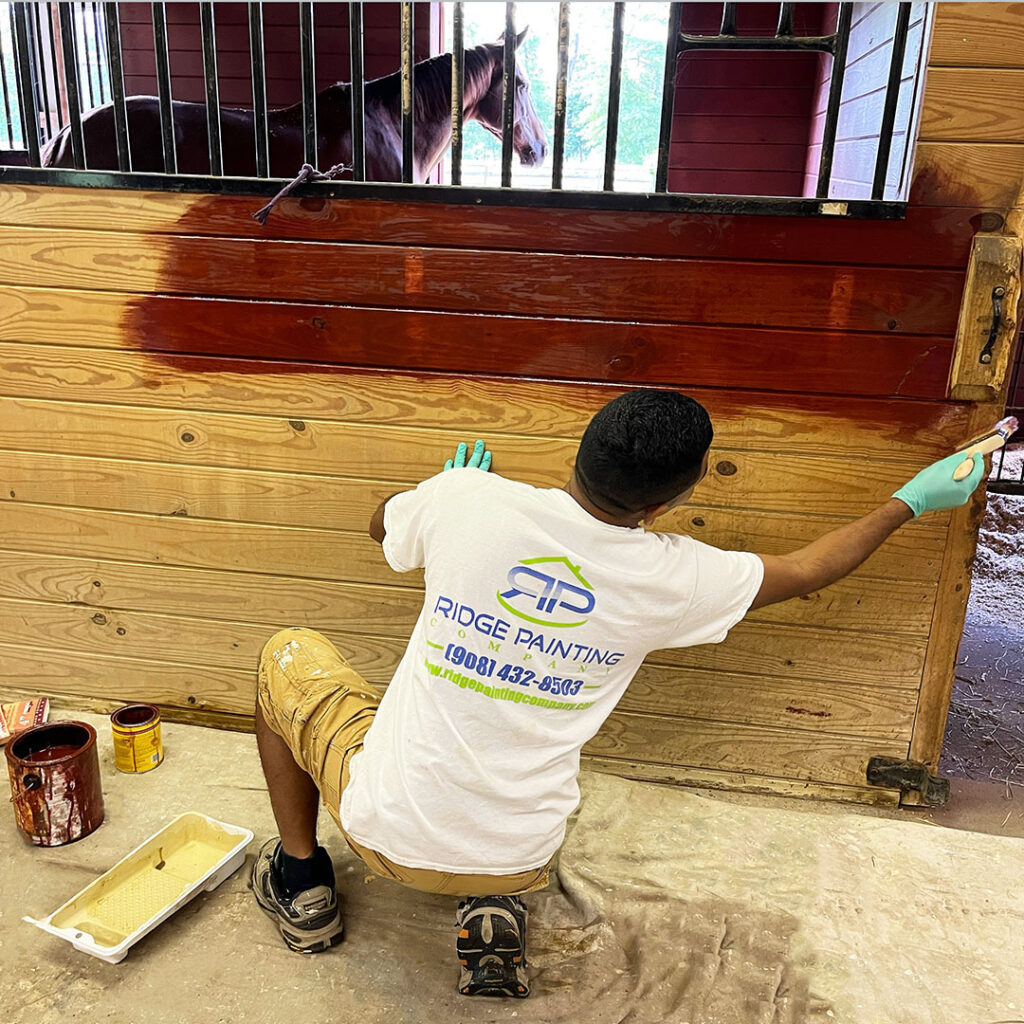
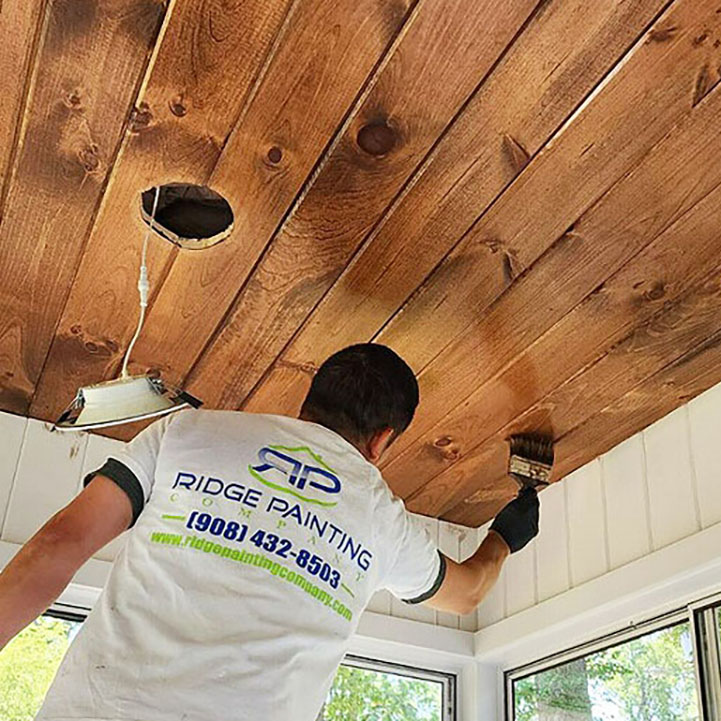
Applying stain is a process that requires patience and precision. The wood must first be sanded smoothly to open up its pores, then cleaned to remove any dust or debris. When applying the stain, it’s crucial to work in sections and maintain a wet edge to avoid lap marks. The stain should be applied liberally with a brush, rag, or sponge, then wiped off to achieve the desired depth of color. The wiping process not only removes excess stain but also blends the application, ensuring an even coat.
The Impact of Color
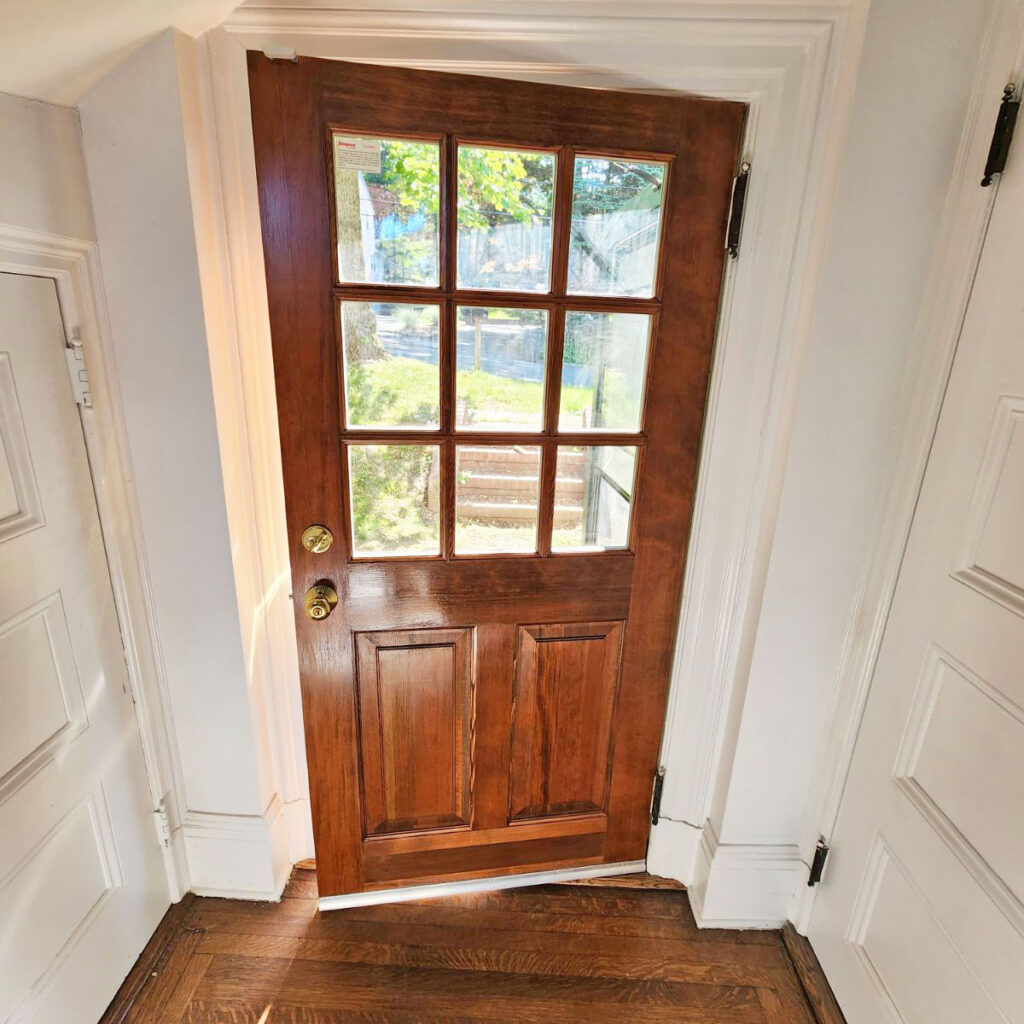
The choice of stain color has a profound impact on the ambiance and aesthetic of a space. Darker stains can add warmth and depth, making large rooms feel cozier, while lighter stains can brighten a space and make it appear larger. The color can also highlight the wood’s natural grain, drawing attention to the craftsmanship of the piece. When selecting a stain color, it’s important to consider the room’s lighting, as natural and artificial light can dramatically alter the appearance of the stained wood.
Choosing the right stain color involves considering the existing decor, including furniture, flooring, and other architectural elements. A well-chosen stain can tie these elements together, creating a cohesive and inviting atmosphere.

The Process of Interior Staining
The journey to a beautifully stained interior begins with preparation, followed by the application of the stain, and finishes with the application of a protective coating.
- Preparation: The key to a flawless finish lies in thorough preparation. Start by sanding the wood surface with fine-grit sandpaper to ensure it’s smooth and free from previous finishes or blemishes. Wipe away the dust with a tack cloth to ensure a clean surface.
- Choosing Your Stain: Interior stains come in various types, including oil-based, water-based, and gel. Oil-based stains are renowned for their durability and ease of application, penetrating deeply into the wood. Water-based stains dry faster and come in a wider range of colors but may raise the grain of the wood, necessitating additional sanding. Gel stains are thicker, providing more control over the application, making them ideal for vertical surfaces.
- Application: Apply the stain using a brush, cloth, or sponge, working in the direction of the wood grain. For an even coat, apply the stain liberally, then wipe away the excess with a clean cloth. The longer you leave the stain on before wiping, the darker the finish will be.
- Layering: If the desired richness or color depth isn’t achieved with the first coat, additional coats may be applied after the first has dried. Always test the stain on a scrap piece of wood or an inconspicuous area to ensure satisfaction with the color.
- Finishing with Polyurethane: After the stain has dried, apply a polyurethane finish to protect the wood from scratches, stains, and water damage. Polyurethane is available in oil-based and water-based formulas, with different sheens from matte to high gloss.
Interior staining is a rewarding project that enhances the beauty and longevity of wood surfaces in your home. By following a meticulous process and choosing the right materials, you can achieve stunning results that celebrate the natural allure of wood. Whether you’re refreshing handrails, accentuating the charm of wood mantles, or adding character to ceilings and beams, staining and the subsequent application of polyurethane offer a way to achieve both aesthetic beauty and functional durability. Embrace the transformative power of stain and polyurethane to elevate your home’s interior to new heights of elegance.
You Might Also Like
 Should I Paint My House Before Selling—Pros and Cons - When people sell their homes, they want to get the best price possible. Maintaining the property is an excellent way to do this. But, home repairs can be expensive, and investing in a property can be risky. Painting is a perfect way to spruce up your house and give it a more modern feel, but … Continue reading Should I Paint My House Before Selling—Pros and Cons
 Interior Paint Colors for Your Office Space - Interior Paint Colors for Your Office Space Colors are known to impact our mood, and can instantly make us feel happy or sad, lively or tired, inspired or unmotivated, the list goes on and on. Because of this, it is very important to choose your interior paint colors strategically and according to the mood you … Continue reading Interior Paint Colors for Your Office Space